Part 1: Creating A Repository And Working With Data
This tutorial will review the first steps of working with a hangar repository.
To fit with the beginner’s theme, we will use the MNIST dataset. Later examples will show off how to work with much more complex data.
[1]:
from hangar import Repository

import numpy as np
import pickle
import gzip
import matplotlib.pyplot as plt

from tqdm import tqdm
Creating & Interacting with a Hangar Repository
Hangar is designed to “just make sense” in every operation you have to perform. As such, there is a single interface which all interaction begins with: the Repository object.
Weather a hangar repository exists at the path you specify or not, just tell hangar where it should live!
Intitializing a repository
The first time you want to work with a new repository, the init() method must be called. This is where you provide hangar with your name and email address (to be used in the commit log), as well as implicitly confirming that you do want to create the underlying data files hangar uses on disk.
[2]:
repo = Repository(path='/Users/rick/projects/tensorwerk/hangar/dev/mnist/')

# First time a repository is accessed only!
# Note: if you feed a path to the `Repository` which does not contain a pre-iniitlized hangar repo,
# when the Repository object is initialized it will let you know that you need to run `init()`

repo.init(user_name='Rick Izzo', user_email='rick@tensorwerk.com')
[2]:
'/Users/rick/projects/tensorwerk/hangar/dev/mnist/.hangar'
Checking out the repo for writing
A repository can be checked out in two modes:
- write-enabled: applies all operations to the staging area’s current state. Only one write-enabled checkout can be active at a different time, must be closed upon last use, or manual intervention will be needed to remove the writer lock.
- read-only: checkout a commit or branch to view repository state as it existed at that point in time.
Lots of useful information is in the ipython __repr__
If you’re ever in doubt about what the state of the object your working on is, just call it’s reps, and the most relevant information will be sent to your screen!
[42]:
co = repo.checkout(write=True)
co
[42]:
Hangar WriterCheckout
    Writer       : True
    Base Branch  : master
    Num Arraysets : 2
    Num Metadata : 0
A checkout allows access to arraysets and metadata
The arrayset and metadata attributes of a checkout provide the interface to working with all of the data on disk!
[43]:
co.arraysets
[43]:
Hangar Arraysets
    Writeable: True
    Arrayset Names / Partial Remote References:
      - train_images / False
      - train_labels / False
[5]:
co.metadata
[5]:
Hangar Metadata
    Writeable: True
    Number of Keys: 0
Before data can be added to a repository, a arrayset must be initialized.
We’re going to first load up a the MNIST pickled dataset so it can be added to the repo!
[9]:
# Load the dataset
with gzip.open('/Users/rick/projects/tensorwerk/hangar/dev/data/mnist.pkl.gz', 'rb') as f:
    train_set, valid_set, test_set = pickle.load(f, encoding='bytes')

def rescale(array):
    array = array * 256
    rounded = np.round(array)
    return rounded.astype(np.uint8())

sample_trimg = rescale(train_set[0][0])
sample_trlabel = np.array([train_set[1][0]])
trimgs = rescale(train_set[0])
trlabels = train_set[1]
Before data can be added to a repository, a arrayset must be initialized.
A Arrayset is a named grouping of data samples where each sample shares a number of similar attributes and array properties. See the docstrings in co.arraysets.init_arrayset:
Initializes a arrayset in the repository.

Arraysets are groups of related data pieces (samples). All samples within
a arrayset have the same data type, and number of dimensions. The size of
each dimension can be either fixed (the default behavior) or variable
per sample.

For fixed dimension sizes, all samples written to the arrayset must have
the same size that was initially specified upon arrayset initialization.
Variable size arraysets on the other hand, can write samples with
dimensions of any size less than a maximum which is required to be set
upon arrayset creation.

Parameters
----------
name : str
    The name assigned to this arrayset.
shape : Union[int, Tuple[int]]
    The shape of the data samples which will be written in this arrayset.
    This argument and the `dtype` argument are required if a `prototype`
    is not provided, defaults to None.
dtype : np.dtype
    The datatype of this arrayset. This argument and the `shape` argument
    are required if a `prototype` is not provided., defaults to None.
prototype : np.ndarray
    A sample array of correct datatype and shape which will be used to
    initialize the arrayset storage mechanisms. If this is provided, the
    `shape` and `dtype` arguments must not be set, defaults to None.
named_samples : bool, optional
    If the samples in the arrayset have names associated with them. If set,
    all samples must be provided names, if not, no name will be assigned.
    defaults to True, which means all samples should have names.
variable_shape : bool, optional
    If this is a variable sized arrayset. If true, a the maximum shape is
    set from the provided `shape` or `prototype` argument. Any sample
    added to the arrayset can then have dimension sizes <= to this
    initial specification (so long as they have the same rank as what
    was specified) defaults to False.
backend : DEVELOPER USE ONLY. str, optional, kwarg only
    Backend which should be used to write the arrayset files on disk.

Returns
-------
:class:`ArraysetDataWriter`
    instance object of the initialized arrayset.

Raises
------
ValueError
    If provided name contains any non ascii, non alpha-numeric characters.
ValueError
    If required `shape` and `dtype` arguments are not provided in absence of
    `prototype` argument.
ValueError
    If `prototype` argument is not a C contiguous ndarray.
ValueError
    If rank of maximum tensor shape > 31.
ValueError
    If zero sized dimension in `shape` argument
ValueError
    If the specified backend is not valid.
[8]:
co.arraysets.init_arrayset(name='mnist_training_images', prototype=trimgs[0])
[8]:
Hangar ArraysetDataWriter
    Arrayset Name             : mnist_training_images
    Schema Hash              : 976ba57033bb
    Variable Shape           : False
    (max) Shape              : (784,)
    Datatype                 : <class 'numpy.uint8'>
    Named Samples            : True
    Access Mode              : a
    Number of Samples        : 0
    Partial Remote Data Refs : False
[9]:
co.arraysets['mnist_training_images']
[9]:
Hangar ArraysetDataWriter
    Arrayset Name             : mnist_training_images
    Schema Hash              : 976ba57033bb
    Variable Shape           : False
    (max) Shape              : (784,)
    Datatype                 : <class 'numpy.uint8'>
    Named Samples            : True
    Access Mode              : a
    Number of Samples        : 0
    Partial Remote Data Refs : False
Interaction
When a arrayset is initialized, a arrayset accessor object will be returned, however, depending on your use case, this may or may not be the most convenient way to access a arrayset.
In general, we have implemented a full dict mapping interface on top of all object. To access the 'mnist_training_images' arrayset you can just use a dict style access like the following (note: if operating in ipython/jupyter, the arrayset keys will autocomplete for you).
[10]:
co.arraysets['mnist_training_images']
[10]:
Hangar ArraysetDataWriter
    Arrayset Name             : mnist_training_images
    Schema Hash              : 976ba57033bb
    Variable Shape           : False
    (max) Shape              : (784,)
    Datatype                 : <class 'numpy.uint8'>
    Named Samples            : True
    Access Mode              : a
    Number of Samples        : 0
    Partial Remote Data Refs : False
[11]:
train_aset = co.arraysets['mnist_training_images']
the full dictionary style mapping interface is implemented
Adding Data
To add data to a named arrayset, we can use dict-style setting, or the .add method.
[12]:
train_aset['0'] = trimgs[0]
train_aset.add(data=trimgs[1], name='1')

train_aset['51'] = trimgs[51]
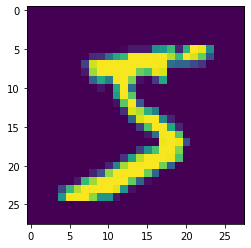
Dictionary Style Retrieval for known keys
[16]:
out = train_aset['0']
plt.imshow(out.reshape(28, 28))
[16]:
<matplotlib.image.AxesImage at 0x11c16b9b0>
[17]:
train_aset
[17]:
Hangar ArraysetDataWriter
    Arrayset Name             : mnist_training_images
    Schema Hash              : 976ba57033bb
    Variable Shape           : False
    (max) Shape              : (784,)
    Datatype                 : <class 'numpy.uint8'>
    Named Samples            : True
    Access Mode              : a
    Number of Samples        : 3
    Partial Remote Data Refs : False
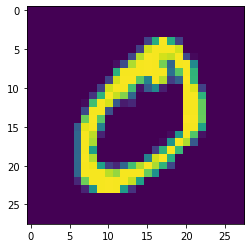
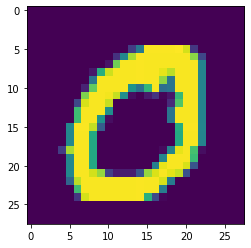
Dict style iteration supported out of the box
[18]:
for k in train_aset:
    # equivalent method: for k in train_aset.keys():
    print(k)


for v in train_aset.values():
    plt.imshow(v.reshape(28, 28))
    plt.show()

myDict = {}
for k, v in train_aset.items():
    myDict[k] = v
0
1
51

Performance
Once you’ve completed an interactive exploration, be sure to use the context manager form of the .add and .get methods!
In order to make sure that all your data is always safe in Hangar, the backend diligently ensures that all contexts (operations which can somehow interact with the record structures) are opened and closed appropriately. When you use the context manager form of a arrayset object, we can offload a significant amount of work to the python runtime, and dramatically increase read and write speeds.
Most arraysets we’ve tested see an increased throughput differential of 250% - 500% for writes and 300% - 600% for reads when comparing using the context manager form vs the naked form!
[10]:
import time

# ------------------ Context Manager Form ----------------------


aset_trimgs = co.arraysets.init_arrayset(name='train_images', prototype=sample_trimg)
aset_trlabels = co.arraysets.init_arrayset(name='train_labels', prototype=sample_trlabel)

print(f'beginning non-context manager form')
start_time = time.time()
pbar = tqdm(total=trimgs.shape[0], leave=True)
for idx, img in enumerate(trimgs):
    if (idx % 500 == 0):
        pbar.update(500)

    aset_trimgs.add(data=img, name=str(idx))
    aset_trlabels.add(data=np.array([trlabels[idx]]), name=str(idx))

pbar.close()
print(f'Finished non-context manager form in: {time.time() - start_time} seconds')

co.reset_staging_area()
co.close()

# ----------------- Non-Context Manager Form ----------------------

co = repo.checkout(write=True)

aset_trimgs = co.arraysets.init_arrayset(name='train_images', prototype=sample_trimg)
aset_trlabels = co.arraysets.init_arrayset(name='train_labels', prototype=sample_trlabel)

print(f'beginning context manager form')
start_time = time.time()
pbar = tqdm(total=trimgs.shape[0], leave=True)
with aset_trimgs, aset_trlabels:
    for idx, img in enumerate(trimgs):
        if (idx % 500 == 0):
            pbar.update(500)

        aset_trimgs.add(data=img, name=str(idx))
        aset_trlabels.add(data=np.array([trlabels[idx]]), name=str(idx))

        pbar.close()
print(f'Finished context manager form in: {time.time() - start_time} seconds')
0%| | 0/50000 [00:00<?, ?it/s]
beginning non-context manager form
100%|██████████| 50000/50000 [01:29<00:00, 570.33it/s]
Finished non-context manager form in: 90.59357118606567 seconds
1%| | 500/50000 [00:00<00:05, 9598.43it/s]
beginning context manager form
Finished context manager form in: 20.370257139205933 seconds
Clearly, the context manager form is far and away superior, however we fell that for the purposes of interactive use that the “Naked” form is valubal to the average user!
Commiting Changes
Once you have made a set of changes you wan’t to commit, just simply call the commit() method (and pass in a message)!
[21]:
co.commit('hello world, this is my first hangar commit')
[21]:
'd2a9e7559252fba729694dd31f3474710b9153e9'
The returned value ('d2a9e7559252fba729694dd31f3474710b9153e9') is the commit hash of this commit. It may be useful to assign this to a variable and follow this up by creating a branch from this commit! (Branching to be covered in the next round of tutorials)
Don’t Forget to Close the Write-Enabled Checkout to Release the Lock!
We mentioned in Checking out the repo for writing_ that when a write-enabled checkout is created, it places a lock on writers until it is closed. If for whatever reason the program terminates without closing the write-enabled checkout, this lock will persist (forever technically, but realistically until it is manually freed).
Luckily, preventing this issue from occurring is as simple as calling close()!
[34]:
# Just call...

co.close()
But if you did forget, and you recieve a PermissionError next time you open a checkout
PermissionError: Cannot aquire the writer lock. Only one instance of
a writer checkout can be active at a time. If the last checkout of this
repository did not properly close, or a crash occured, the lock must be
manually freed before another writer can be instantiated.
This is a dangerous operation, and is one of the only ways where a user can put data in their repository at risk! If another python process is still holding the lock, do NOT force the release. Kill the process (that’s totally fine to do at any time, then force the lock release).
[35]:
repo.force_release_writer_lock()
[35]:
True
Inspecting state from the top!
After your first commit, the summary and log methods will begin to work, and you can either print the stream to the console (as shown below), or you can dig deep into the internal of how hangar thinks about your data! (To be covered in an advanced tutorial later on).
The point is, regardless of your level of interaction with a live hangar repository, all level of state is accessable from the top, and in general has been built to be the only way to directly access it!
[36]:
repo.summary()
Summary of Contents Contained in Data Repository

==================
| Repository Info
|-----------------
|  Base Directory: /Users/rick/projects/tensorwerk/hangar/dev/mnist
|  Disk Usage: 69.93 MB

===================
| Commit Details
-------------------
|  Commit: 25a6ca6b84112ab209c1916c29ee1075fe8a6b52
|  Created: Mon Aug  5 23:44:26 2019
|  By: Rick Izzo
|  Email: rick@tensorwerk.com
|  Message: commit on testbranch

==================
| DataSets
|-----------------
|  Number of Named Arraysets: 3
|
|  * Arrayset Name: mnist_training_images
|    Num Arrays: 3
|    Details:
|    - schema_hash: 976ba57033bb
|    - schema_dtype: 2
|    - schema_is_var: False
|    - schema_max_shape: (784,)
|    - schema_is_named: True
|    - schema_default_backend: 00
|
|  * Arrayset Name: train_images
|    Num Arrays: 50000
|    Details:
|    - schema_hash: 976ba57033bb
|    - schema_dtype: 2
|    - schema_is_var: False
|    - schema_max_shape: (784,)
|    - schema_is_named: True
|    - schema_default_backend: 00
|
|  * Arrayset Name: train_labels
|    Num Arrays: 50000
|    Details:
|    - schema_hash: 631f0f57c469
|    - schema_dtype: 7
|    - schema_is_var: False
|    - schema_max_shape: (1,)
|    - schema_is_named: True
|    - schema_default_backend: 10

==================
| Metadata:
|-----------------
|  Number of Keys: 1
[37]:
repo.log()
* 25a6ca6b84112ab209c1916c29ee1075fe8a6b52 (testbranch) : commit on testbranch
* d2a9e7559252fba729694dd31f3474710b9153e9 : hello world, this is my first hangar commit